
How to jailbreak iOS 5.1.1 using absinthe.
Absinthe is an Unthered Jailbreak till iOS 5.1.1
STEPS:
1) Plug your iDevice in your PC.
2) Download Absinthe 2.0.4 and iOS 5.1.1 from our download page.
3) Open Absinthe 2.0.4
4) When your iDevice is shown click Jailbreak.
5) Enjoy Cydia.
STEPS:
1) Plug your iDevice in your PC.
2) Download Absinthe 2.0.4 and iOS 5.1.1 from our download page.
3) Open Absinthe 2.0.4
4) When your iDevice is shown click Jailbreak.
5) Enjoy Cydia.
How to Put Your Device into DFU ModeLearning how to reliably place your iDevice into DFU mode is a step that you must learn if you want to be an effective jailbreaker.
DFU mode stands for Device Firmware Upgrade mode and differs from the restore mode with the iTunes logo that you may be used to. DFU mode differs from recovery mode because it does not load the boot loader, hence you will see a solid black screen instead of the more friendly “connect to iTunes logo”. Getting into DFU mode is super easy, but it does require some practice. We generally recommend putting your device into DFU mode prior to even starting any jailbreaking actions, because it just makes the process more seamless.
To place your device into DFU mode, do the following:
Step 1: Connect your device to your computer
Step 2: Hold the Home + Power buttons on your device simultaneously for 10 seconds.
Step 3: Release the Power button without releasing the home button. Continue holding Home for another 10 seconds.
Step 4: Release Home, and your screen should stay completely black. If so, chances are you successfully entered into DFU mode.
Notes: If iTunes is configured to do so, iTunes will open and report that: “iTunes has detected an iPhone in recovery mode. You must restore this iPhone before it can be used with iTunes.” If your screen is black and iTunes reports this message, this is a surefire indicator that you are successfully in DFU mode.
To kick your device out of DFU mode, simply hold Home + Power for 10 seconds and release. The Apple logo should then appear.
For more help with DFU mode, see the following video explanation:
How to Jailbreak an A4 and below + A5 Device With RedSn0wWith the release of RedSn0w 0.9.12b1, you can now jailbreak A5 devices on iOS 5.1.1 (iPad 2, iPhone 4S, iPad 3) using the Rocky Racoon exploit.
This jailbreak was previously not incorporated into RedSn0w; instead you had to rely on the standalone Absinthe tool, or the Rocky Racoon untethered jailbreak tweak from Cydia. With the latest version of RedSn0w, it is now possible to untether jailbreak A5 devices running iOS 5.1.1. This method also works with A4 devices and below running iOS 5.1.1. This is the preferred method to use when jailbreaking with RedSn0w.
How to Jailbreak A4 and below (no A5) device With RedSn0w Jailbreaking your iDevice with RedSn0w is extremely simple as long as you follow the directions.
Every time a new firmware is confirmed to be jailbreakable, we will post a new video that shows you how. The latest jailbreakable firmware is iOS 5.1.1. Please see the video below that shows how to jailbreak this firmware with RedSn0w using DFU traditional method. This method works with A4 devices and below only. For this reason, it is preferable if you use the non-DFU method below.
Note: Again, this works with A4 devices or below only. If you have a newer A5 device, use this tutorial.
Step 1: Connect your A4 device or below to your computer.
Step 2: Place the device into DFU mode.
Step 3: Download RedSn0w 0.9.12b1 and run.
Step 4: Click Jailbreak.
Step 5: On the options menu, ensure “Install Cydia” is checked, and click next.
Step 6: Once your device is back on your Lock screen, unlock it run Cydia. Congratulations, your A4 or below device is now jailbroken using the iOS 5.1.1 untether.
Tethered Booting With RedSn0w
Tether Booting is the action of booting an iDevice that has been jailbroken using a tethered jailbreak. Unlike untethered jailbreaks, tethered jailbreaks require a tethered boot anytime you wish to reboot the device. Please see the video below for a tutorial that shows how to perform a tethered boot with RedSn0w.
Preserving Baseband With RedSn0w
Preserving your baseband is useful if your current baseband is unlockable, and you want to keep that baseband but still upgrade your firmware to the latest version. Newer versions of RedSn0w are now capable of preserving your baseband, which was once a feature that was exclusive to the Dev Team’s PwnageTool jailbreak tool. Please see the video below that shows how to preserve your baseband with RedSn0w.
Using Pwned DFU Mode
Pwned DFU mode is almost the same as normal DFU mode with a slight twist. Unlike regular DFU mode, Pwned DFU mode allows you to use iTunes to restore your iDevice with custom firmware (IPSW) created by Preserving your Baseband with RedSn0w.

Please refer to our Preserving Baseband With RedSn0w video for additional insight into Pwned DFU mode. Pwned DFU is also needed when following our downgrade tutorial referenced in our How to Use the Recovery Fix section below. You only need to use this mode when you have created and are restoring your iDevice using custom firmware. In every other circumstance, normal DFU mode should suffice.
How to Use the Recovery Fix
The RedSn0w recovery fix option is instrumental for those moments when you receive recovery errors when performing restores in iTunes. It’s especially useful when attempting to downgrade firmware that is no longer being signed by Apple.
Here is an example of the error that you may receive in iTunes that the Recovery Fix can remedy:
Here is an example of the error that you may receive in iTunes that the Recovery Fix can remedy:
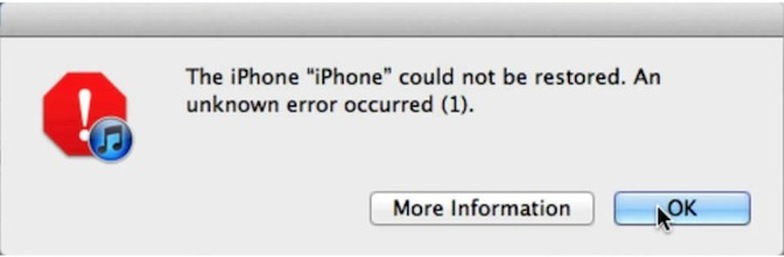
The following video showcases how to use the Recovery Fix option when downgrading iOS 5 back to iOS 4.
Although there have been methods in the past geared towards skirting around a broken Home button in order to jailbreak an iPhone, I don’t remember any of them being as easy as this.
If your Home button is on the fritz, then chances are you have problems getting into DFU mode, which is a prerequisite to using most jailbreak software. Fortunately, the iPhone Dev Team has come up with a simple, yet ingenious method for easily pushing your device into DFU mode using their latest update to the RedSn0w jailbreak tool.
RedSn0w 0.9.14b2 allows you to create a firmware file that will push your device into DFU mode once a normal restore through iTunes is completed. Check out our full tutorial inside for the step-by-step video walkthrough…
Step 1: Download and open RedSn0w 0.9.14b2
Step 2: On RedSn0w’s main window click Extras > Even more > DFU IPSW, and click OK on the pop-up dialogue.
Step 3: Browse for a valid signable IPSW file from Apple. For instance, if you have an iPhone 4, you want to select the iOS 5.1.1 firmware, since that’s the only firmware that Apple is signing at the moment for this device (as of 7/5/2012). If you don’t have this firmware file, remember you can download firmware from our downloads page.
Step 4: Once you select the file, RedSn0w will go through the process of creating a new IPSW firmware file that will place your device into DFU mode upon restore. This firmware file will be placed in the same location as your original firmware file, and be named with the prefix ENTER_DFU. For instance, if I selected firmware for my iPod touch 4th generation for iOS 5.1.1, my original file should look like: this iPod4,1_5.1.1_9B206_Restore.ipsw, and my new file should look like this: ENTER_DFU_iPod4,1_5.1.1_9B206_Restore.ipsw.
Step 5: Connect your device to your computer and open iTunes. Select your device in the iTunes sidebar, and hold the Option key (shift on Windows) and click the Restore button. Find your newly created ENTER_DFU IPSW file, and click OK. This will restore your device and place the device into DFU mode upon restore. You should just see a black screen once the restore is finished.
Step 6: Your device is now in DFU mode, with a freshly restored IPSW. You can now jailbreak your device using our easy to follow RedSn0w tutorials.
How to jailbreak iOS 6 with RedSn0w 0.9.15b1

As we reported a couple of days ago, RedSn0w 0.9.15b1 is now available to jailbreak A4 devices and below running iOS 6. This latest version is a pretty massive update with a lengthy change log, but the most important aspect about the update is the ability to jailbreak iOS 6 and install Cydia.
Previous iOS 6 jailbreaks required users to install Cydia manually, but the latest public version of RedSn0w works just as you might expect it would. Take a look inside for our full tutorial.
Previous iOS 6 jailbreaks required users to install Cydia manually, but the latest public version of RedSn0w works just as you might expect it would. Take a look inside for our full tutorial.
Note: This is a tethered jailbreak for iOS 6; A4 devices and below.
Step 1: Download RedSn0w 0.9.15b1 and open it.
Step 2: Place your iOS device into DFU mode. (Hold Home+Power for 10 seconds, release Power while still holding Home for an additional 10 seconds. The screen should remain black.)
Step 3: Click Jailbreak. A few items will load, and you’ll be presented with a “Please select your options”. Ensure Install Cydia is checked, and click next. The jailbreak process will finish in about 5 minutes.
Step 4: Once the process is complete and you’re back on the Home screen, place your device back into DFU mode.
Step 5: Go back to the main page of RedSn0w, and select Extras > Just boot. A tethered boot will be performed, and you should see Cydia on your Home screen once your device boots back up.
Step 6: Launch Cydia, and enjoy.
How to jailbreak iOS 6.0.1
Note: This is a tethered jailbreak for pre-A5 devices (iPhone 4, iPhone 3GS, iPod touch 4th generation) only.
Step 1: Download RedSn0w 0.9.15b3 and iOS 6.0 for your specific device from our Downloads page.
Step 2: Connect your device to your computer and place it into DFU mode.
Step 3: Open RedSn0w, and ensure it detects your device.
Step 4: Click Extras > Select IPSW, and select the iOS 6.0 firmware for your device. It should successfully identify the build.
Step 5: Go back to the main RedSn0w page and click Jailbreak. RedSn0w will process, and then allow you to install Cydia, which should be already checked on the next screen. Click Next, and the jailbreak will finish processing and begin on your iPhone. Keep RedSn0w open.
Step 6: Once the jailbreak is complete and you are back on your device’s Lock screen, place your device back into DFU mode.
Step 7: On the main page of RedSn0w click Extras > Just boot. This will perform a tethered boot. Your device should reboot with a pineapple logo.
Step 8: Once the device reboots, you should see Cydia on the Home screen.
How to jailbreak iOS 6.1 beta
Note: iOS 6.1 beta is for developers only.
Step 1: Download RedSn0w 0.9.15b3 and iOS 6.0 from our Downloads page.
Step 2: Place your pre-A5 device into DFU mode with it connected to your computer.
Step 3: Open RedSn0w, and click Extras > Select IPSW, and select the 6.0 firmware for your device. It should successfully identify the 6.0 firmware. Click back.
Step 4: Click Jailbreak on the main page of RedSn0w, then once it’s finished loading, ensure Install Cydia is checked and click Next.
Step 5: The jailbreak process will begin, and it will take a bit to finish. Once finished, you should be at your Lock screen. Close out of RedSn0w.
Step 6: Place the device back into DFU mode, and reopen RedSn0w. Go to Extras > Select IPSW, and again point to the 6.0 firmware.
Step 7: Once it successfully identifies, click Just boot. A tethered boot will be performed, and eventually you’ll end up back on your Lock screen. Unlock the device, and you should see Cydia on the second page of your Home screen.
Congratulations, you just jailbroke iOS 6.1 beta.
Managing SHSH Blobs With RedSn0w
Fetch:Submits your SHSH blobs to Cydia. Requires DFU mode.
Verify:A method to verify what SHSH blobs are available. Requires DFU mode.
Submit:Submits blobs residing on your Mac or PC directly to Cydia for caching. No DFU mode required
Query:Queries the Cydia server about all blobs for a device. Uses the ECID to accomplish this, no DFU mode required.
Stitch:Stitching is a feature that allows you to create an all encompassing IPSW firmware file that can always be used regardless of whether or not Apple is still signing that particular firmware. Stitching combines both the firmware file with the SHSH blob for that device to allow you to downgrade at anytime. This is a highly recommended procedure to do every time a new Firmware version is released. It will ensure that you can always easily go back to a previous firmware with minimum steps. Please see the following video tutorial to learn more about stitching. Note: Stitching is not yet compatible with iPhones.
